Getting Started: How to install WordPress

Getting Started: How to install WordPress

WordPress is a state-of-the-art blogging platform with a focus on aesthetics, web standards, and usability. Under most circumstances, installing WordPress is a very simple process and takes less than five minutes to complete.

What’s the difference between Installing WordPress and WordPress.com

You can set up your blog at WordPress.com and have your site online. This is different than installing WordPress on your server. WordPress.com stores all the files on their server and you need to get an account with them to set it up. When you install WordPress on your server, you are bypassing WordPress.com and using your Hosting server to store the blog data. This allows you to manage the WordPress site your self without having to go through WordPress.com. The link below explains how to migrate your WordPress.com site to NetNGN Hosting.

How to Migrate your WordPress.com site to NetNGN Hosting


Methods to install WordPress on your server

WordPress is a free program that you can get online. There are 2 ways you can install WordPress on your server.

Install using Softaculous

Manually Installing the Software


Installing WordPress with Softaculous

For servers that have Softaculous installed in the cPanel, you can install WordPress with only a couple clicks. Softaculous will upload the files, configure the database, and set up the installation all for you without having to download any files or configure anything.

Install WordPress using Softaculous


Installing WordPress manually

You can install WordPress by downloading the files and uploading them to your server. You will need to set up a database and database user, upload the files with FTP or the File manager, and configure the config.php file on the server.

Installing WordPress manually

How to Migrate your WordPress.com site to NetNGN.com

How to Migrate your WordPress.com site to NetNGN.com

Step 1: Install WordPress on your NetNGN Server

If you already have a blog site hosted on WordPress.com, you can easily move the site over to your WordPress site.  Your current site can be migrated from your wordpress.com to your WordPress site with us in only a few easy steps that we will outline below.

Click here to find out how to install WordPress


Step 2: Export your WordPress.com site

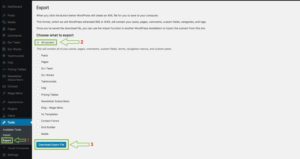
Now that you have installed WordPress, log into your Dashboard at your old WordPress.com site.  Then, click on the “Tools” option on the left hand menu.  This will open an expanded menu, click on “Export“:

Tools Menu

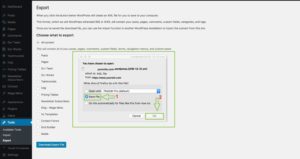
On the Export page, click on the “All content” radio button and then “Download Export File.”  If a dialogue box appears, make sure that you choose to Save the file. This will save a .xml file to your computer, make sure you remember where it saves to.

Save As

Step 3: Begin File Import

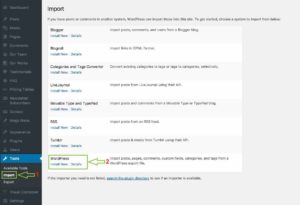
Now that you have saved your content, log into your Dashboard at your domain that is (or will be) hosted with NetNGN Hosting.  Once you have logged in, click on “Tools” on the left hand menu.  This will open an expanded menu, click on “Import.” On the Import screen, click on “WordPress: Install Now“:

Tools/Import

Step 4: Run the importer

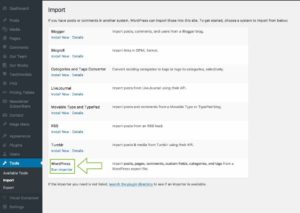
Once installed click “Run Importer”:

Run Importer

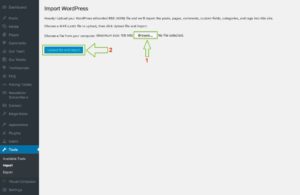
Now browse for the .xml file you downloaded and click “Upload file and import”:

Import WordPress

That’s all!  Now your content from your WordPress.com site has been successfully imported to your NetNGN server.  Make sure to check  that all your content was transferred/imported correctly before canceling your WordPress.com account.